Category Archives: Office365

woman holding book with blank pages

Add Another Screen to your Custom List Form with Power Apps

Note: This is more of an “idea that might be useful” than a “how-to” post.

Add a Second Screen… for Governance?

Adding a second screen is not rocket science. It’s super easy as you’ll see below. Navigating between two screens is just as easy. In most cases, you’re adding new screens as a part of a larger app with forms, views, and all sorts of wonderful functionality. In this case, we’re merely adding a second screen to inform the user, to provide a space for information not usually made available otherwise.

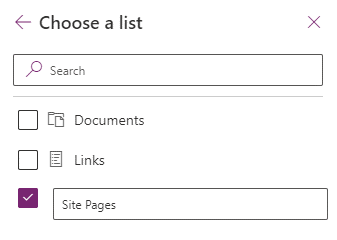
When customizing a list form in Microsoft Lists or SharePoint, Power Apps creates a special app to replace the default list forms. What makes it special from a Power Apps perspective is that it doesn’t show up in the Power Apps “Apps” listing. It is only available as a part of the list that it’s created for. It also includes a special component called “SharePointIntegration”. I’m not digging into that component in this post, but it’s used to control which Power Apps forms are stitched together with which list Actions.

The vast majority of apps I’ve seen extending lists do a one-to-one replacement of a custom Power App app for the default list forms. It makes sense, that’s the scope and context folks are thinking in at the time. What we’re talking about here merely extends that concept with a little more user-friendliness we haven’t been able to easily add before Power Apps was introduced.

The Quick Steps

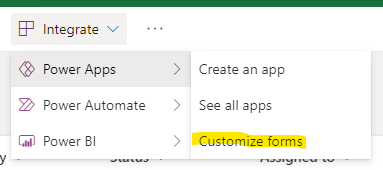
  1. If you haven’t already, create the custom form
  2. Once in Power Apps, add a New screen. “FormScreen1” is the default screen created by the app wizard. If you haven’t added any screens to the app, the new one will be “Screen1”.
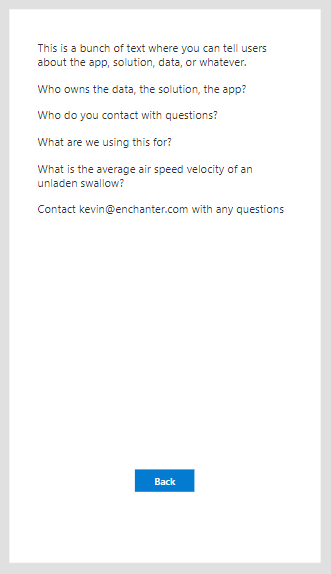
  3. On the new form, add a Text Label (see below for a suggested layout)
    • Add whatever text you’d like to the control. This is the super helpful text for the user to help them be successful using your form.
  4. On the new form, add a Button
    • Set the button Text to “Back” or whatever makes sense for you.
    • For the button OnSelect, set the formula value to “Navigate(FormScreen1)” – back to the original screen.
  5. On the original screen, add a Button
    Let your UX guidelines dictate where the button should be located on the screen.
    • For the button OnSelect, set the formula value to “Navigate(Screen1)” – navigate to the new screen.
    • Set the button text to “Info”, “More”, “About”, or whatever makes sense to your users.

Your new (second) screen might look something like this – as an extremely simple example. There’s obviously a LOT more you could do with this. The second screen merely unlocks the possibilities without cluttering up your custom form.

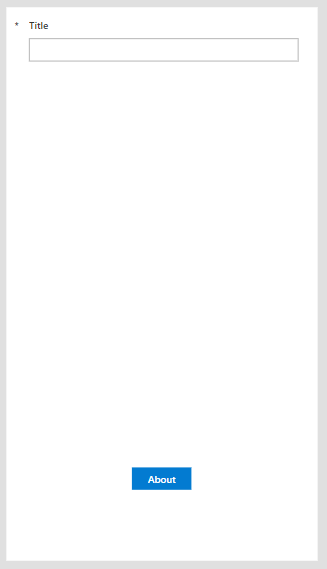
Your first screen might look similar to this, but likely with more fields displayed on the form. The key difference we’re adding here is the button that takes the user to the second screen. Check with your UX folks on how to properly position it.

It might be interesting to consider adding a second screen to the app and having it presented to the user *first* – along the lines of a disclaimer the user must accept before continuing. You’d likely need to tweak the SharePointIntegration control to get that working the way you want it. Just a thought.

Potential Uses

There are lots of potential uses here. Just as many as most other Power Apps as the customized list forms really are fully functional apps. The context, however, being part of a list – will likely drive how additional pages might be used.

  • Content and information sharing (as done here)
    • Who to contact with questions
    • Instructions for the form
  • Visibility to metrics about the list, open items, how fast requests are closed…
  • Additional functionality you don’t want to mix with the main form
  • Visibility to data from another data source
  • … and lots of other things

References

Note: Power Apps Week

So apparently this is Power Apps Week for followers of the Power Hype Machine 😉 as #PowerAddicts get ready for the Power Platform Conference this Fall. I don’t know exactly what that means, but I’m willing to bet David Warner can tell you.

In celebration, I’ll post a few short posts about Power Apps – most, or all, highlighting quick and easy ways to extend M365 capabilities for folks getting their feet wet with Power Apps. Enjoy!

M365 Twin Cities #M365TC

What is M365 Twin Cities?

M365TC is and organization and event built on the foundation of 10+ years of SharePoint Saturday events. M365TC – like SharePoint Saturdays, SQL Saturdays, and Code Camps, and others – is a free one-day in-person training event put on and supported by the community. Organized by volunteers. Paid for by sponsors. With sessions presented by industry, platform, and community experts in their fields. It’s a ton of great learning potential for you as an individual and for your organization as a whole.

It’s an opportunity for attendees to get free training regardless of organizational budgets. It’s an opportunity for folks to exercise their personal initiative to learn and explore. It’s an opportunity for new speakers to give presenting a try and experienced speakers opportunities to share their knowledge. It’s a mentoring opportunity. It’s a touch point for local service providers and broader service and product vendors to connect with local folks as customers and partners. It’s a networking event to connect with peers in the metro and region.

We usually have two events per year – in the Spring and Fall – that support the rapidly changing technology we talk about. If we have a successful January 2023 event, we’ll likely return to that cadence starting in the Fall of 2023.

By the numbers

For the Saturday January 21, 2023 event, we have:

Why M365?

“M365” is a shift from “SharePoint” as the Microsoft ecosystem shifted, morphed, and expanded. Our SharePoint Saturday events had SharePoint at the center but covered plenty of tangential topics where technology and skill integrations happened. Now, under the M365 umbrella, SharePoint is still a foundational piece but is complemented by a suite of related products and platforms – led now by Teams and working along other areas such as the Power Platform and Azure to name just a few. “M365” provides for the broader scope required to attract attendees, speakers, and sponsors.

Our event here in Minnesota has historically been one of the larger events in the country, though the pandemic took a bite out of our momentum. It’ll take a little time to work back to the events we’ve had in the past – assuming the community still demands them. So please let us know if you are interested in what we’re doing by registering to attend, by spreading the word to co-workers and peers, by letting your organizational leadership and vendors know that we need sponsors to put these events on.

Links

Connect Power Apps to SharePoint Online Site Pages Library

Trying to connect Microsoft Power Apps to a SharePoint Online library, specifically the Site Pages library ran into a little snag. Usually, when connecting to a data source you pick the site, then get a list of lists. Site Pages does not show up.

However, you can select the checkbox for the last/blank option, fill in “Site Pages” and proceed.

The connection should work just fine, and you can go about your Power Appy business.

Hiding a “Breaking” News Web Part in SharePoint Online

Overview

The topic of a web part that is visible when it contains content and not visible when there is no content to display came up while delivering a recent session and several folks thought it was interesting so I figured I’d throw the details up in case anyone else needed to see it.

This is purely out-of-the-box functionality that’s available with the News web part and IMO it works pretty slick.

On a page with multiple News web parts, one web part is configured to act as a “Breaking News” web part (above, in red).

This particular web part will only display one or two news posts at a time and is filtered to show items with a custom “Breaking News” property set to “yes”. The web part will not be visible when it is empty and any web parts below it in the same zone will slide into it’s place.

The disappearing functionality is made possible by enabling a setting in the “Layout” section of the News web part shown here:

That’s it. 🙂 Enjoy

References

Representing Events in Microsoft SharePoint – Collision between Modern and Functional

Background

There are a number of use cases for having visibility to one or more calendars in SharePoint intranet pages – calendars or events lists where a small groups of folks maintain the list of events and a large group consumes the info.

What are the recommendation on how to achieve this?

Calendars in an intranet. That’s the main detail being considered here. How big of a deal is it?
(No really, I’m curious, please let me know in the comments.)

Initial Thoughts and Letdowns

When it comes to the data, Outlook or Exchange handle dates and events best. However, the only surfacing of data between Exchange and SharePoint is the Group Calendar web part. Group Calendars allow everyone to see it, but also allow anyone to add, edit, and delete from the calendar. Not what we want.

SharePoint has historically had an Events list, that also does a good job of managing events – including All-day and Recurring event capabilities. A SharePoint list has list permissions that allow it to be configured with certain editors and certain viewers. However, the only way to surface the calendar view of this list is using a “classic experience” with the functionality we want but with a very dated interface that not only clashes with SharePoint’s modern look, but is only available on a modern page by embedding the view using an iframe. No web part available.

When using the “new experience” of the Events list, there is a new Calendar view type.

showlist

While this calendar looks great in the modern page, it currently seems to be buggy, does not carry through useful features of the classic view like overlays, has issues with filtering items, and does not currently work with the List View web part (but can be displayed with an iframe embed similar to the classic view). Some of these issues may be resolved with a reported update rolling out “soon” (September CY2021).

NOTE: The calendar view for modern lists isn’t just for event-like lists (which is what this post is focused on). The view can be used for *any* list type with a date column and in many cases is a really nice stop forward for those lists.

A bigger problem with the new experience and the Events list is that when using the new experience the All-day and recurring capabilities are broken. These properties and functionality do not show up in forms, though the fields still exist in the list. To make matters more confusing, while in the new experience, click ‘New’ and get the New item form. The form does not show the All Day Event or Recurrence fields, but if you edit the form, both fields are listed and checked as if they should be visible. Not cool for users or power users…

My guess is that this may be happening because of the integration of Microsoft Lists with the SharePoint interface and that Microsoft Lists do not seem to be able to handle these features either – creating a bit of an inconsistency in the interface. If you create a Microsoft List, you can create Start Date and End Date columns and align them with the new Calendar view, but there doesn’t seem to be a capacity to handle other date/event specific functionality that was available with the classic Events list.

SharePoint does also offer a Events web part, which attaches to the Events list. Rather than displaying in a traditional calendar view, the web part offers two different ‘tile’ views – following that little UX trend. While it may be a change for users, the web parts are a nice offering and definitely has its place within the intranet, highlighting upcoming events rather than leaving users to sort through a calendar view. Clicking on events also leads to a few special pages: Events.aspx and Event.aspx that are clean and easy to read. They also DO respect the event All-day and recurrence feature – which is good, but inconsistent with the modern calendar view mentioned above.

With that, Events appear to be at a bit of a crossroads – with some messy collisions – between classic and new/modern functionality that I hope Microsoft will clean up soon.

Conclusion for now

For now, the best solution seems to be continuing to use the Events list as long as it is available, adding the Events web part to the toolbox (previously only used calendar views), and embedding a calendar view until an updated List View web part comes along. It seems like there are a few “broken windows” here that I hope Microsoft repairs soon. A functional calendar view web part will take a nice step or two forward. Knowing what the plans are for Microsoft List support for events would also be nice.

Am I missing some critical feature or capability that solves these needs? Does the enterprise have have these calendar/event requirements?

What are you using in your intranet?

Questions

  • What is the Microsoft roadmap for Events going forward?
  • Events lists are shown as “Classic” features.
    • Will they continue to be supported?
    • Is there a timeline for support, replacement, or deprecation?
  • Will events be supported in Microsoft Lists?
    • You can create a list with start date and end dates, but no “Recurrence” or “All Day” functionality.

References

Microsoft Lists – Broken Home Page

Has anyone else experienced this?

When going to Microsoft Lists – both via the browser and the app, the page that displays my Favorites and Recent Lists errors out with the following:

MyLists

Fortunately, there is one workaround I’ve been able to use for the short term, going back to the Office home page (www.office.com) that displays all Office files including your Lists.

Also of note: I can still create and use lists just fine.

It would be nice, however to have my Lists page up and running. Please let me know if you’ve encountered this in your tenant and/or found any resolution. I’d love to get more info on what a root cause might be, if there are other repercussions, how to resolve it, etc.

Thanks!

Modern SharePoint Page Approval with Power Automate: Message Optional

Overview

The current iteration of page approvals in SharePoint Online using Modern pages and news is handled by Power Automate – and the integration is pretty slick. Kudos to the Microsoft teams responsible for it (SharePoint + Power Automate).

Approval Flow

Once an approval flow has been configured and a user submits a page, the user is prompted by the following panel:

Approval Panel

Note here that the Message field is required. In many cases, this is fine. There are some circumstances however where site owners may want to make the Message field optional.

The Quick Steps

Without getting into all the nitty gritty, here’s how it’s done (at least one approach):

  1. Go into Power Automate and open the approval flow
  2. On the first step of the flow, expand the “For a selected item” step
  3. For the “Message” property, select the menu (three dots) button and select “Make the field optional”)
    Flow Field Optional
  4. Expand the scope (mine is called “Scope 2”), and the “Start and approval” step
    Approval Details
  5. Click on the “Details” expression (circled above) – which opens the panel for updates
    Approval Expression
  6. Update the expression to include a question mark (“?”) after “triggerBody()” and before “[‘text’]”.
    Expression Text
  7. Click “Update” (see above)
  8. Save the flow, and test

When an approval is submitted, the Message field in the panel should now show as “not required” – no asterisk should be visible. The panel should allow users to leave the field blank and “Submit” the page for approval without error.

Not Required

The Details

One example I’ve seen where this is applicable is a site where there is a content management team that does a significant amount of the page creation, but also has folks outside the normal content team that submit content from time to time. Approval is needed. When the main content team is creating pages – they want to get through it and keep moving. The Message field turns into a “junk” field, they keyboard smash or put some useless text in the field in order to submit the page. This is irritating for users and inserts bad/silly data into the system. Rather than remove the field outright, we’d still like to have it available when needed – by folks outside the team, for example.  

Let’s review how this works. Open up the flow. Then expand the “For a selected item” step (Step 3 above).

Changing the Message field to “Make the field optional” seems pretty straight-forward. It will even work for some flows. But by itself this change will not work for all scenarios. The flow will fail when the Message field is left blank because later in the flow a step attempts to use the text IN the field. When that text is blank, the flow fails. 

If you run/test the flow with no Message text, you can open the failed instance of the flow to see where the error occurred. The scope will show an indication that something is wrong. When you expand the scope you can see the error on the “Start an approval” step. This flow fail is also followed up by a “Something went wrong…”  email from Microsoft Flow.

Broken Flow

Looking at the error message, there’s something wrong with ‘text’, which looks like it’s pointing back to the Message field we changed.

If we test run the flow again, and put text in the message, the flow works fine.

Looking at steps 4-6 above, you can see where the additional change needs to be made – adding a question mark to the expression. This syntax (the “?”) allows the expression to evaluate the Message field – [‘text’] – as Null when it is empty. Before we added the question mark the expression didn’t know what to do with a blank Message field and failed the flow. 

Note: I haven’t been able to find official documentation anywhere on what the “?” syntax is within expressions, how to use it, when to use it, etc. Maybe my search skills are falling off. If you find something from Microsoft, let me know and I’ll update this post and references for it. Until then I’ll include what I did find below.

References

Paul Stork has the most information I’ve seen on the use of the question mark (?)  thus far as seen in this community post:
Solved: Use of Question Mark(?) in expressions – Power Platform Community (microsoft.com) 

Another blog that references the question mark with regards to a Power Automate expression
Power Automate – how do we check if a property exists in the object? | It Ain’t Boring (itaintboring.com)

Modern SharePoint + Power Automate Approval with Select User Auto-Approve

Background

I’m still a Power Automate newb. Lots of you have been working with these for years now. I’m legit curious what silly things I’m doing, what other approach I should be taking, what best practices to integrate, etc.

So let me have it… in the comments here, in Twitter, whatever. I’m waiting.

Overview

Power Automate backed approval flows for a SharePoint intranet site on the Site Pages library. Pretty slick and polished as a replacement for SharePoint workflows and nice template to look at for Automate newbs. Kudos Microsoft folks.

Now, however, I’d like to have approvals on my site, but also have them bypassed for certain users – folks that own the site, do the majority of content generation, etc. I still want the process in place because I have other content contributors that I still want to manage.

So, we have an out of the box page approval flow that I want to tweak.

It sounds potentially easy, but we all know better. There will be some pain. And there is. But we can work with it.

What I did

The out of box page approval flow looks as follows:
OOB Approval Flow

With the exception of a few new variables I added, all changes were limited to the “Scope 2” step. When I was finished, the top level view looked like this:
(Yes, I should be consistent with my naming – I’ll clean that up)

Final Approval Flow

I’ll walk through the variables shown above as we go.

Who Gets Auto-Approved

This is a topic that could be debated in terms of the best way to manage the list or folks that get auto-approved. Should you use a list, an Azure Group, a SharePoint Group, or something else? For simplicity’s sake, I’m going with a list. It’s the easiest to maintain visibility and control at the team level without needing to work with a security team every time we need to change a group. I’m also pretty confident that Automate can get to the data I need in a list. I’m not yet sure about the other approaches. Obviously a decision like this may vary org to org. For this example, we’re using a list.

I created a SharePoint list and called it “AutoApproveNews”. Yep, I’m old school and don’t like spaces in my list names. I’m not messing with the Title field right now, so just left it alone and required. It’ll need to be filled with rubbish for now. The only column I added to the list was AutoApproved as a Person or Group field displaying the Name. Yes, the name might not be unique… so something to look at later to seal the process up a bit more. Using the email address is probably a nicer, more unique, approach but I haven’t tried that variation yet.

I didn’t do anything special with permissions for the list while validating this concept, but there are a few ground rules you’d likely want to follow.

  • Make sure whatever connection you’re using to SharePoint from Automate has access to the list.
  • Lock down the list to the folks that manage content so random users can’t just add themselves.
  • I also found it useful to remove the list from navigation. Don’t like cluttering things up unnecessarily.

First note on variables

The approach I’m using is that I’m going to get the name of the person submitting the news article, iterate through my list of folks that get auto-approved, and trip a flag that indicates I found a match.

So with that, AutoApproveFlag is created and set to false.

NewsSubmitter is set to the name of the person that added the new news article or page from the “For a selected item” step.
Submit Variable

The other variables are used in the text of the email, so you can fill in whatever fits for you. Here’s what I did for now:
Variable Initialize

You’ll see where they fit in down below.

New Steps

Using as much of the default flow as possible.

  1. After the “Set content approval status – Pending” add a step to “get items from” a SharePoint list and point it to the AutoApprovedNews list we just created.
  2. Add a “Apply to each” step to iterate through the SharePoint list data.
    Add a condition where if a match (comparing the AutoApproved field to the NewsSubmitter variable) is found, set the AutoApproveFlag variable to true.
  3. Add a Condition step. Test for the value of variable AutoApproveFlag – if not true (no matches found), then start the flow approval. I added the condition step and then dragged the existing “Start an approval” step into the No condition.

    Note: Because there will be some conditions where the Approval doesn’t exist, I need to change some of the email steps later in the flow because they use properties of the Approval in their email content – hence the other two variables that were created: strApprover and strComment. (I should be consistent with variable naming, started thinking about that after I was underway – cleanup for later)

  4. The default flow has a Condition step that waits for the approval response. I didn’t see a way to change the condition the way I wanted, so I created a new Condition step to check for an approval response OR check if the AutoApprovedFlag variable was set to true.

    Note: DO NOT delete the original Condition step until after #5 below and you’ve moved/copied the steps from the original to the replacement.

    Original:
    Original approval

    Replacement:
    New Approval

  5. Move or copy the steps in the yes and no conditions to the new condition step (#4 above). I was able to drag and drop some, but also needed to use the preview functionality of copying steps to the clipboard and then used the “Add an action” feature to add from clipboard.
  6. Now you can delete the original Condition you just copied the steps from.
  7. In order to clean up the emails sent later, I needed to replace Approval properties in the email content with variables that would work both when approvals were automatic and manual. In order to make these work, I needed to add a Condition step and Set Variable steps.

    With new Condition rules, moved steps, and an additional Condition step, the flow looks like this:
    After Moves

    Setting the variables as follows:
    Set Approval Vars

  8. Finally, we need to update the email content to replace the Approval properties with variables. Only the “Send email notification” steps (both “Yes” and “No” outcomes) under the scheduling condition (“Check if content has been schedule or not”) need to be updated.

    These are the ones you’re changing:
    Which email steps

    From this:
    TextBefore

    To this:
    TextVariables

  9. After we’re all done, Scope 2 looks like this:
    Scope2

I think that’s everything. I’ll update if I find additional details.

Recap, Summary

It works. What am I missing? What should I have done different?

Bring it!!

References and stuff

Thanks to Mark Rackley for a few pointers…

Modern SharePoint – Workflow and Approval Visibility with Power Automate

I’ve been out of the pages and workflow game for a bit while focusing elsewhere – so playing a bit of catchup in certain areas. Plenty of folks have been digging in here for a long time, so what I’m learning and re-learning isn’t news, but it is new to me and I’m sure there are others in the same boat. There are plenty of folks on older versions of SharePoint that are, or will eventually, make a similar move to SharePoint Online as I’m working on/helping with right now.

In legacy versions of SharePoint, we’ve had workflows and approvals around for some time. These have been managed through SharePoint Designer (SPD) (…may it RIP) and surfaced directly in the list settings where workflows were implemented. Looking something like this:

LegacyWorkflow

In “Modern” SharePoint – SharePoint Online – the preferred and recommended workflow solution is Power Automate, which creates “flows” instead of workflows.

The SharePoint and Power Platform (umbrella group within MS that owns Power Automate and sibling technologies) folks have done a nice job integrating Power Platform tools within the SharePoint interface – including Power Automate and specifically approval workflows. Baked directly in the SharePoint list top nav/action bar:

Automate Integration

Out of the box, configuring a page approval flow is super easy and pretty darn elegant as an approval solution. Kudos Microsoft.

NOW. One of my first questions after turning one of these on was “Where can I see all my open approvals and manage them as needed?”. Because hey, I want visibility and the ability to override stuff. A few key points:

  • Configuring a page approval flow adds an “Approval Status” field to your library – so you can see the status in your Site Pages view
  • Users can review approvals on the submitted page itself and get there via the “three dot” menu on individual items in the Site Pages view “More –> Review Approvals”
  • Open approvals do NOT show up in the Workflow Settings page (shown above)
    • Initially, this might be kind of irritating, but it does make sense. The Workflow Settings page is SharePoint workflows, not Power Automate approvals
    • It would be kind of nice to have some note or even a link to where users can find the new approvals, but I suspect this page has a limited life left and probably isn’t worth updating

So, if you haven’t guessed it yet – where we find that list of open approvals, as well as history and lots of other goodies, is in the Power Automate interface.

There are several ways to get there, but the easiest for folks working in SharePoint already is to use the menu shown above and select the “See your flows” option. This will open a tab to Power Automate. In the left menu you’ll see Action Items –> Approvals.

Approval Flows

Ultimately, this is super easy and makes sense. But if you’re coming from legacy SharePoint and you haven’t made the mental shift to working with Power Automate yet you might just need a little nudge. Hopefully this helped.

SharePoint Modern Challenges – Weather Web Part

Overview

Working on a “relatively simple” intranet, using as much out of the box capabilities as possible… and running into what seem to be silly issues.

Want to display the weather. Cool (Haha, see what I did there?), seems legit. Should be easy. There’s a Weather web part.

Edit the page. Add the web part. It asks for the location. Nice and simple lookup that finds my desired location easily. The company has multiple locations, so we add multiple locations to the web part. Still looks good.

I can set the Celsius vs. Fahrenheit setting for the web part, but users can also override. Looks good.

I can override the displayed city name for each location.

That’s it for configuration/customization.

Issues

  • When does this web part update? How often? Can an update be forced?
    All unknowns. It would be nice to have this information as it does NOT seem to update on a timely basis and well… it’s weather – that changes regularly, if not quickly.
  • I have multiple locations in my web part. When I click the “MSN Weather” link for more information – like the next few days forecast – ALL locations configured within the web part seem to land on the same location’s info.
    • Not sure where it’s getting this default location. Might be the tenant’s default, the MSN site may be using web location settings, might be something else.
      I haven’t narrowed that down yet.
    • The link for each location appears to be individually configured as I can see the location of the web part in the link string.
      Does the MSN Weather site no longer recognize the URL string and/or parameters being passed in?
      Is something else overriding the desired location? Either way – it doesn’t work as users would expect.

Resolutions

None yet. I’ll update this if/when I find answers or work-arounds.

References

Show the weather on your page – Office Support (microsoft.com)